Graduated Neutral Density Filter

Getting a camera to see more like our eyes do requires some extra equipment. Cameras can deal with bright areas well, and they can deal with dark areas well. But when the two appear in the same photograph, one or both of those areas will suffer.
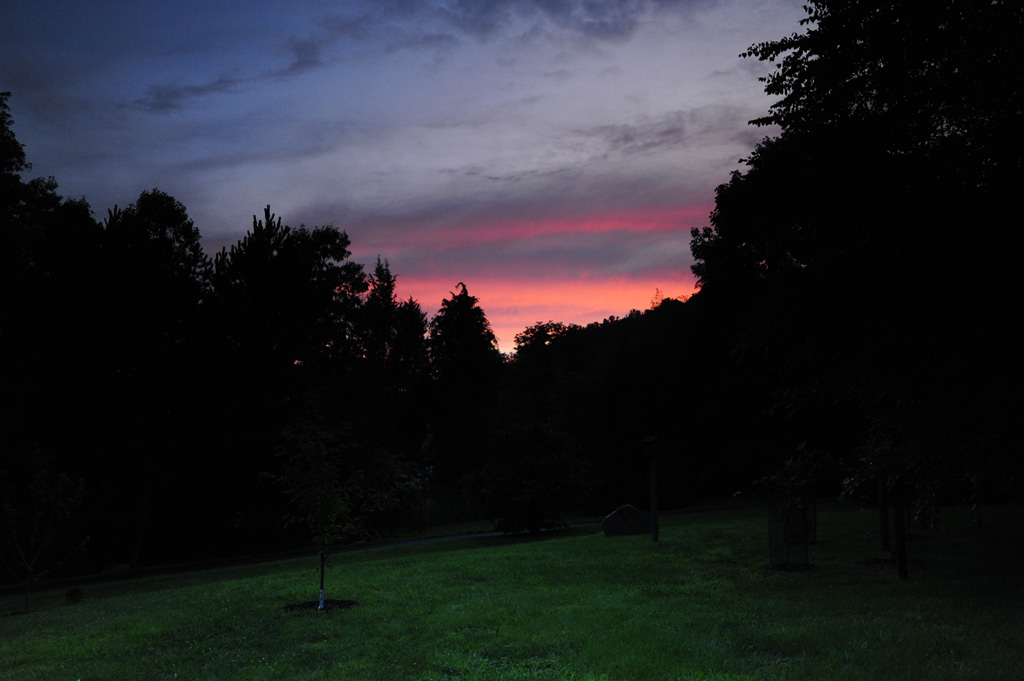
Take a look at this photo straight from the camera:

This photo contains a bright area (the sky) and a dark area (the foreground). This photo was taken with a Nikon D700 on full auto. The D700 has a built-in feature called ADR (Automatic Dynamic Range). This feature attempts to “even out” both the bright and dark areas to try and preserve the details in both, but even with this feature, they sky is washed out, and there is almost no visible detail in the shadows.
When viewing the scene with the naked eye, one can easily see details in both the bright and dark areas because our eyes’ dynamic range is much higher than that of a camera. In order to duplicate the ability of the human eye, we must have something that can darken the bright areas down to levels near the dark area so the camera can register the details in both.
A graduated neutral density filter is the answer.
 The graduated neutral density filter fits over the lens and has a clear portion and a darkened portion. The photographer positions the filter in front of the lens so that the darkened portion of the filter is over the bright portion of the scene, and the clear portion of the filter is over the dark area of the scene. These filters come in “hard” and “soft” edges, which basically determine how abruptly the filter transitions from light to dark. A “hard stop” filter has an edge that goes very quickly from light to dark whereas a “soft” filter has a more gradual transition. In doing some research, it seems that most photographers prefer the hard edge.
Now the “before” and “after” side-by-side comparison.
The photo on the right is without the filter. On the right is with the filter. As you can see in the photo on the right, the bright area has much deeper color, and you can actually see the grass in the foreground. The trees were just too dark to pull any detail from, and truthfully, both photos’ dark areas are underexposed, but you get the idea. If I played around with the settings more, I might have gotten more detail, but this simple example shows you why graduated neutral density filters should be in every photographers camera bag.
Before you buy a filter or set of filters, there are some other things you need to know.
The darkened area of the filter can come in varying degrees of darkness, so that you can match the filter to your lighting needs. A common designation for a filter is ND 0.3 or ND 0.6 or ND 0.9, where the decimal number indicates how dark the dark area is. This was confusing to me at first, because I normally think of varying light by f-stop, and indeed many neutral density filter manufacturers use f-stop to describe the density of their filters. Top filter manufacturers like Singh-Ray and Lee use the decimal number for the graduated filters, and it works something like this:
|
Filter Designations |
||
|
ND Type |
B+W, Cokin, Hoya |
Lee, Tiffen |
|
1-stop |
ND2, ND2X |
0.3 ND |
|
2-stop |
ND4, ND4X |
0.6 ND |
|
3-stop |
ND8, ND8X |
0.9 ND |
In the left most column of the table, is the f-stop differential between the light and dark areas of the graduated ND filter. The middle and right hand columns show you the corresponding manufacturer designations for their filters. So, for example, a 0.3 ND will give you 1 f-stop difference between the light and dark areas of the filter. Simple!
In addition to these designations, filter types vary by how they mount to the lens. One type of filter is circular, and screws on the the front of the lens like most other types of filter. The other type is a square sheet that mounts to a special holder that is then mounted to the lens. The two types have their advantages and disadvantages.
 The round filter type is compact, and mounts like a normal filter, but the light and dark areas are separated right across the middle of the filter, which limits your composition options.
 The square filter with special holder with grooves in it to allow you to move the filter up and down (or sideways) to position the division between light and dark areas of the filter directly over the corresponding dark and light areas of the scene. This gives you more freedom to place those areas in different positions of the frame as you compose the shot. The disadvantages of these filters is that they are bulky, more difficult to handle, and can be more prone to unwanted reflections of stray light due to the gap between the mount and the lens surface.
Personally, I’ve chosen the latter. I like shooting landscapes, which is a “slower” form of photography than say, shooting sports or wildlife. I’d rather have the freedom of moving the filter around so I can be more free to position the camera the way I want and compose the way I want. Reflections are generally not a problem if you get a set of good-quality filters.
Hi…
Thank you so much for sharing such a nice information. I was looking for a P-type ND filter set and the gray gradient filters for my Canon Camera having 28-200mm Lens size. It should be inexpensive. I am using square filter right but not satisfied enough for it’s work. Do you suggest me?
Kood makes nice P-types at reasonable prices. Try googling Kood p-type.