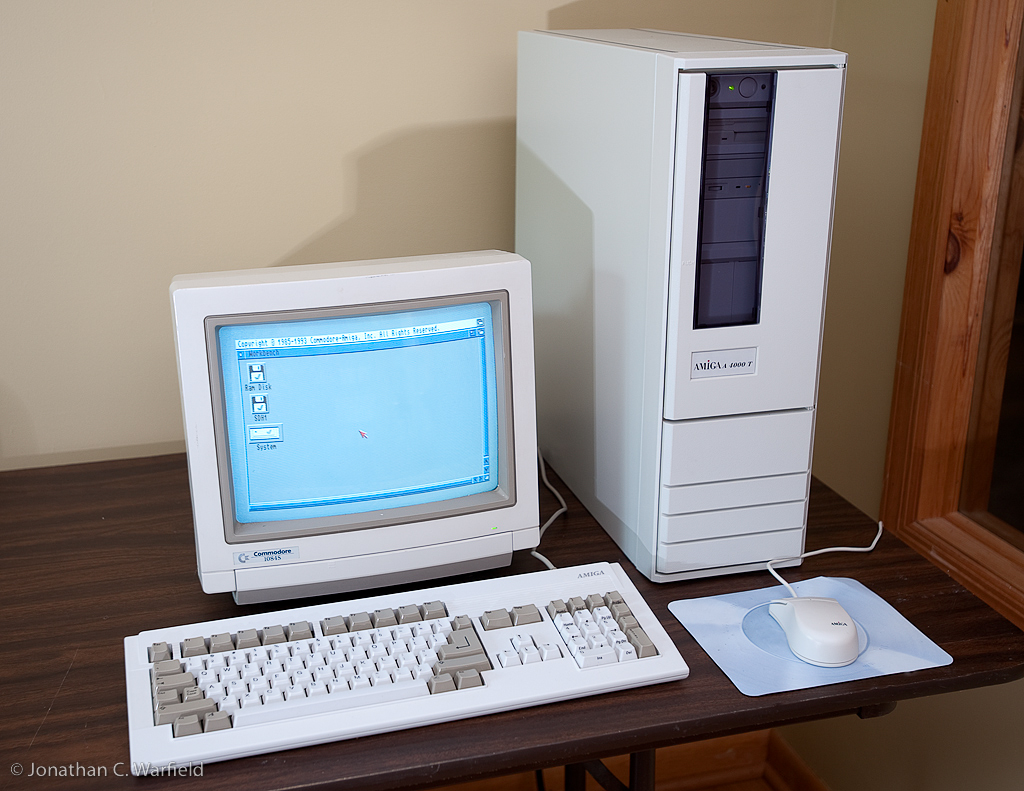
Amiga A4000T
Since piquing my curiosity with the Amiga 2000 Video Toaster a little while back, I did more research and decided that I wanted to build an Amiga 4000 Video Toaster/Flyer rig. Why? See this site’s tagline above. Okay, more reasons why to follow. Read on…

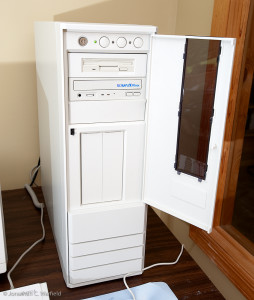
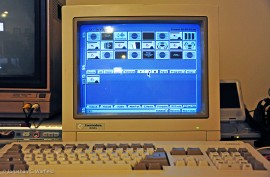
The first model carrying the Amiga badge was the A500 introduced in 1985, and the last model was the A4000T (pictured here) in 1994, just before Commodore closed it’s doors. The A4000T was the tower version of the smaller, desktop-sized A4000. Amigas were popular machines to use with Newtek’s Video Toaster expansion card and software that together turned the Amiga into a sophisticated video effects machine. Then Newtek introduced the Flyer expansion card that enabled the Amiga to capture and store video on the hard drive, creating one of the first desktop non-linear video editing machines and ushering in the desktop video production revolution.
This entire system was way ahead of its time. In fact, if you watched the Terminator 2 movie, and/or the Babylon 5 and Seaquest DSV television shows, then you saw digital effects that were rendered on the early Amiga Toaster systems.
The original A4000 and A4000T were powered with a Motorola 68040 processor clocked at 25mhz and could be expanded up to a whopping 16MB of RAM. After Commodore folded in 1994, a company called Escom purchased the Amiga assets and created a subsidiary called Amiga Technologies. It then began producing the A4000T again until it too, folded in 1997.
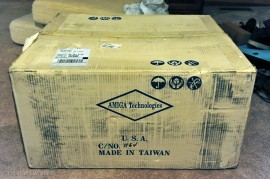
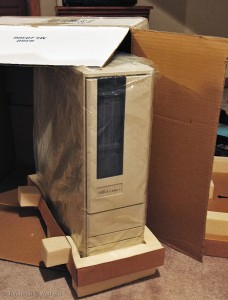
The interesting thing is that even though Commodore and Escom went belly-up, you can still buy a brand-new A4000T today. This one came from Software Hut in Exton, Pennsylvania, USA. I’m not even sure if they are still being made, or if this is new old stock.
So, the main reason for this trip back in time with yester-tech is to turn this into a classic Video Toaster/Flyer machine and do some old-time video editing, maybe capturing some of my vintage Tamiya’s running around in truly vintage fashion.
In order to do this, I had a lot of work to do with this bare-bones A4000T. Out of the box, A4000T’s specs are:
- 68040/25mhz processor
- 16mb RAM
- 3.5 inch double density floppy drive
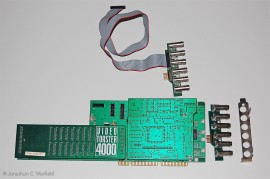
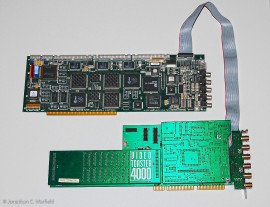
The first task was to acquire a the Newtek Video Toaster and Flyer expansion cards for the Amiga. Not too hard to do with the likes of ebay. The Flyer card is a little harder to come by than the Toaster card, but they both come up on ebay fairly regularly. The photo to the left is the Video Toaster 4000 expansion card. It was the last Toaster card that Newtek produced for the Amiga computer. The photo on the right shows Toaster 4000 card joined to the companion Flyer card. To make them work together, the rear BNC video connector ports on the Toaster card must be replaced with the set provided with the Flyer card. The replacement BNCs connect the Toaster card to the Flyer card and directs video and audio inputs to the Flyer during video capture.
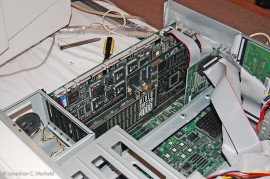
Both of these cards run pretty hot, which is one of the main reasons the A4000T came to be. The smaller, desktop A4000 was cramped by comparison and heat could build up rapidly with the Toaster and Flyer installed. In the photo above, both cards are installed in the A4000T case in two Zorro II expansion slots. I have them two slots apart to provide some space for cooling.
With the cards installed, the next item on the to-do list was to get some SCSI hard drives for the Flyer card. The flyer card has three SCSI connector ports right on the card to connect three or more hard drives, up to 21 total (7 in each SCSI chain). In a typical three-drive setup, one drive was used to store audio, and the other two stored video. The Flyer card was pretty much a complete computer on its own, and required fast hard drives to store the resource-hungry audio and video.
Acquiring SCSI drives is a funny thing. Prices vary wildly, and so do the types of SCSI connectors. Coupled with the fact that the Amiga Workbench operating system has drive size constraints that are different from the Flyer card, it can all get pretty confusing.
I can’t seem to make sense of the prices out there. Doesn’t seem like drive size matters much. Seems that some vendors just want to gouge buyers because SCSI drives have been largely superseded by newer, faster interfaces like SATA, so I guess they figure that the only person buying a SCSI drive must be desperate. In any case, just google for a bit and you’ll find some reasonable prices out there.
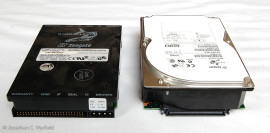
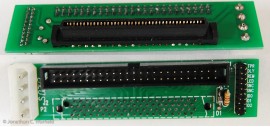
I managed to get three Seagate ST150176LC 50GB drives for the Flyer, and two Seagate ST32550N 2.1GB drive for the Amiga operating system for $19 each. A 50GB drive the same price as a used 2.1GB drive. Go figure. I only need one drive for the OS, but both drives were used, so I figured I’d better pick up a spare. 2.1 GB is plenty of storage for the OS and program software. We’re talking software from the early 1990’s that ran on drives typically around 40MB. Now the 50GB drives used an 80 pin SCSI connector while the 2.1 GB drives used the older 50 pin connector. The A4000T and Flyer card both use the 50 pin type. Not to worry, a quick ebay search found an 80 to 50 pin adapter that plugs right into the back of the drive and allows power to be hooked up as well as the SCSI device number to be set with included jumpers. Word of advice, if you need these adapters, buy them off ebay for about $1 USD each. Anywhere but ebay, and vendors are charging a ridiculous $20-$30 each!
Next came the software install. I actually installed the 2.1GB drive and Amiga OS before installing the Toaster and Flyer cards and 50GB drives, just to be sure I could get a basic A4000T system up and running. I also installed a SCSI CD-ROM drive, another item that varies wildly in prices, so search around a bit before putting your money down. I got a 40x drive for $20.
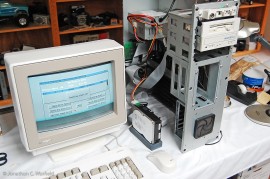
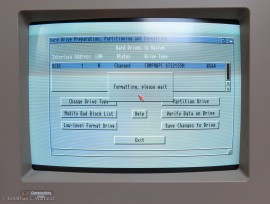
The Amiga Workbench 3.1 OS floppy disks came with the A4000T and installing was pretty straightforward. Just put in the install disk, use the HDTools program to do a low-level drive format. Once that’s done, reboot and format the drive for storage using the Format command on the Tools menu to prepare the disk for OS installation. Once that format is done, reboot and install the OS using the InstallWB3.1 program on the install disk.
Next the Toaster and Flyer cards were installed, and the Toaster 4.3 software I got from Software Hut.
So, at this point, here are the updated A4000T’s specs:
- Escom Amiga A4000T
- 68040/25mhz processor
- 16MB RAM
- 1 – 2GB SCSI drive for OS and applications
- 3 – 50GB SCSI drives for Toaster/Flyer Video and Audio
- UltraPlex 40X SCSI CD-ROM drive
- Newtek Video Toaster 4000
- Newtek Video Flyer
- Commodore 1084S monitor
After installing all the Toaster/Flyer stuff, a moment of truth arrived. These drives, Toaster and Flyer cards, and computer hardware were almost 20 years old. Would it all work?
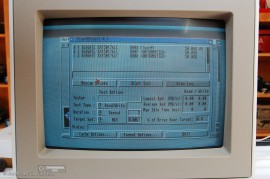
Yes! We have a pulse! As you can see in the photo above, the system is recognizing the three SCSI Flyer drives. The Flyer comes with it’s own dedicated hard drive tools for formatting. You can see I’ve formatted the first drive already. Formatting was an easy task of simply highlighting the drive and clicking the Format Options button. The Flyer uses Newtek’s own proprietary file system when formatting the drives. The file system is optimized for fast video and audio recording and playback. Fast for its day, at least.
Second moment of truth: Will the Toaster/Flyer software run?
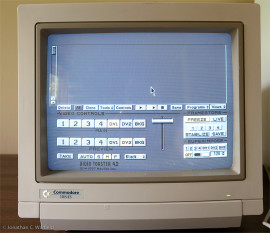
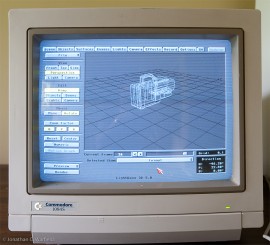
Why, yes it will! The photo on the left is the main Toaster screen. The photo on the right is a a 3D object rendered in Lightwave, which is 3D object creation and rendering software included as part of the Toaster bundle.
This journey ends here for the moment. Next step? I need to get some manuals for the Toaster/Flyer. I have a Toaster manual, but it’s an earlier version and does not include the Flyer instructions, which as a product, came out later. Fortunately, Newtek is still in business, and still makes Video Toasters (much more sophisticated these days) and will provide documentation and technical assistance for ANY Toaster product they’ve made!
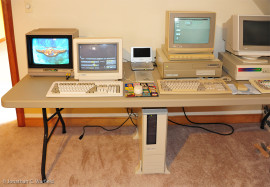
Update: Manuals have arrived and I’ve rearranged some furniture, acquired a work table, and fully configured the Toaster/Flyer system in the A4000T.
So far, I’ve managed to capture quite a bit of video, and performed some editing. I hope to have something posted to YouTube shortly. The complete system is comprised of the following pieces from left to right:
- Commodore 1702 monitor – used for previewing video, effects, and editing results.
- Commodore 1084S monitor – used for operating the Toaster/Flyer software
- Portable DVD player – Input video source
- Amiga A4000T – On the floor under the table. The main computer housing the Newtek Video Toaster and Flyer boards and all hard drives
- Amiga 2000 – Also a complete Toaster system (no Flyer), but used only to power two DPS-TBC II Time Base Corrector cards
- Amiga A4000 – Desktop model. Also a complete Flyer system, but not used with the A4000T system.
While it’s already been mentioned, here again are the A4000T specs so we can see it all together:
- Escom Amiga A4000T
- 68040/25mhz processor
- 16MB RAM
- 1 – 2GB SCSI drive for OS and applications
- 3 – 50GB SCSI drives for Toaster/Flyer Video and Audio
- UltraPlex 40X SCSI CD-ROM drive
- Newtek Video Toaster 4000
- Newtek Video Flyer
- Commodore 1084S monitor
Update: Well, it’s been a long time coming, but I finally captured and edited my first video using this system.
Here’s what the final video edit looks like on the Amiga Toaster system. The upper half of the screen has multiple rectangle graphics called “croutons”, Newtek’s nickname for video elements, that include the segments of captured video and audio as well as interspersed digital effects like fade in/fade out, wipes, transitions. The lower half of the screen is dedicated mainly to program tasks like drive and file operations, effects selection, etc.
Once you have all the pieces, or croutons, of your video project arranged in the proper order, you then connect your recording device (VCR, DVD burner or the like) to your Toaster outputs, and hit the “play” button in the Amiga software. You play your project from the Amiga, and record the output to your recorder. There is no producing a “final” video file like we do today.
In my case, I had the video/audio outputs from the Amiga connected to the inputs of a set top DVD burner. Once I recorded the video to DVD, I ripped the video from the DVD as an MP4 and uploaded to YouTube. Not a very efficient method, but it’s the easiest way I found to merge the old world of Amiga video to the new(er) world of YouTube.
So, this is the video. The subject of the video is my friend Bill running his vintage Cox .049 powered Dune Buggy. The buggy dates from around 1975, and so does the background music I’ve chosen, heh. Vintage buggy, vintage music, and vintage computers! It doesn’t get much more retro than that!
[wordbay]amiga toaster[/wordbay]
You may also like
2 comments
Leave a Reply
Archives
- April 2025
- March 2025
- February 2025
- January 2025
- December 2024
- November 2024
- October 2024
- September 2024
- August 2024
- July 2024
- June 2024
- May 2024
- April 2024
- March 2024
- February 2024
- January 2024
- November 2023
- October 2023
- September 2023
- August 2023
- July 2023
- April 2023
- March 2023
- September 2022
- September 2013
- August 2013
- March 2013
- September 2012
- June 2012
- December 2011
- August 2011
- July 2011
- May 2011
- March 2011
- January 2011
- December 2010
- November 2010
- September 2010
- August 2010
- July 2010
- June 2010
- April 2010
- March 2010
- February 2010
- January 2010
- December 2009
- November 2009
- October 2009
- September 2009
- August 2009
- July 2009
- June 2009
- May 2009
- April 2009
- March 2009
- February 2009
- January 2009
- December 2008
- November 2008
- October 2008
- September 2008
- August 2008
- July 2008
- June 2008
- May 2008
- April 2008
- March 2008
- February 2008
- January 2008
- December 2007
- November 2007
- October 2007
- September 2007
Excellent write up! Really really good. Love to see part #2.
Amiga Forever!
Cheers.
Nice info on building your amiga VT system.I also just dug out my A2000HD after years of storage and plan to create my own VT system. I also just bought a toaster 2.0 off ebay and looking for software for my A2000.
Good luck.
Jim