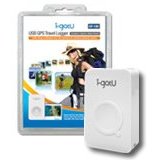
i-gotU GPS Travel Logger

After taking a trip, I usually have a plethora of photos with which to bore unsuspecting family members and co-workers, but occasionally I get some nice snaps, and folks want to know where I took the picture. With the i-gotU GPS Travel Logger, I can show them exactly where.
The i-gotU is a tiny device that takes GPS readings at regular intervals as you move about. The device logs your position and the time the position reading was taken. Later, you can pair up your i-gotU’s GPS data with photos taken with your digital camera. Using the included software, and time recorded by both the i-gotU and your camera, you can easily determine exactly where your photographs were taken. The software integrates with Google maps to plot your travel route and provide indicators to where your photographs were taken. It is important that your camera’s internal clock and the i-gotU are in sync to make it work. The i-gotU get’s its time from the GPS system, so it does not need to be calibrated, so you only need to ensure that your camera reflects the correct time.
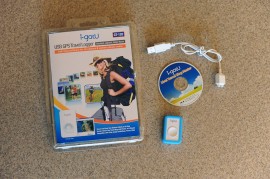
The i-gotU comes with the GPS logger unit, USB cable, and @trip software to make it all work. Also included with the package is the ability to create a free account on the @trip webhosting service where you can upload your photos to a blog-like site so you can share your trip details and photos with others over the web. You can even integrate your trip with social sites like Facebook and MySpace, or use a embedded code generator to embed the trip details in your own website.
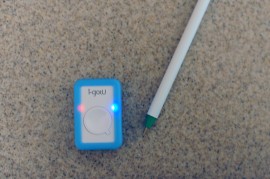
The first thing you’ll want to do is install the @trip software and charge the i-gotU. The software is included on a mini CD-ROM and installs easily enough. Charing of the device is done through the provided proprietary USB cable. It takes about 4 hours to fully charge the device. A red indicator light on the face of the device illuminates to indicate charging, and will turn off when charging is complete. Once charging is complete, simply activate the device to start logging by going outside under a clear sky. Hold the large button (the only button) on the front of the device for about 2 seconds. Both a blue and a red indicator light will flash simultaneously indicating a successful GPS lock and the start of GPS logging by the device.
At this time you would begin to travel about with the i-gotU and your camera. Any time you snap a photo, your digital camera records the date and time into the image file of the photo. Likewise, your i-gotU is taking GPS readings every 5 seconds and recording the date and time of each reading. I happened to take a trip to Oregon to do a photo workshop, so this seemed like a great opportunity to try out the i-gotU.
During our workshop, we spent a couple of days traveling up and down the coast of Oregon to some scenic spots to take photos and learn various photo techniques. I took thousands of photos that represent experiments in exposure and composition, so I won’t bore you with all of those, so I only grabbed a couple for the purpose of this review. The i-gotU will run for about two days continuously, so I recharged it each evening when I got back to the hotel.
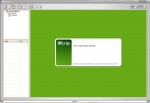

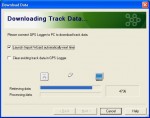
Once my trip for the day was done, I connected the i-gotU device to your PC and started the GPS logging download process. The software will allow you to give the trip a name and will bundle all of the GPS readings under that trip.
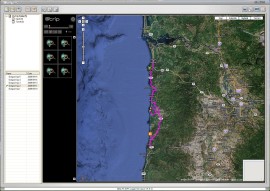
Next, the software will began to plot my route for the day on a Google map. The route is indicated by a colored line on the map.
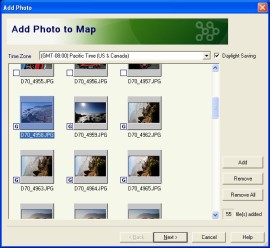
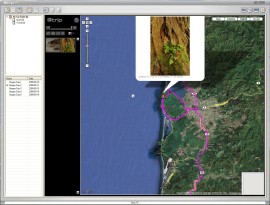
Once the trip is routed, I download my digital camera photos to my computer as I normally would. Once the photos are on the computer, I imported them into the @trip software, and the software began the process of matching my photos’ time and date information with the i-gotU’s GPS data. It then placed graphics of cameras on the Google map, indicating that a photo was taken at that location on the map. Clicking on the camera icon displays a thumbnail of the photo taken at the indicated location.
Pretty cool way of geo-tagging photos, but it doesn’t stop there. The i-gotU’s @trip software is bundled with a free web hosting service to allow you to share your photos with anyone over the internet.
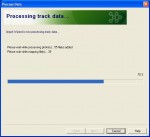
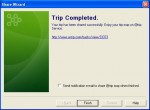
Uploading your trip to the @trip web host is simple. First you create an account, which is simple to do with the @trip software. Once your account is created, you can upload your photos and trip data. After the upload is complete, the software provides you a link to your trip site.
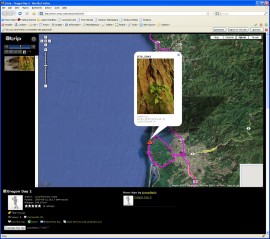
Similar to the desktop software, the @trip website for your trip data displays a map, the route you took as a colored line, and icons indicating where photos were taken.
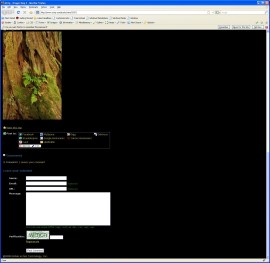
Further down the web page are links for posting your trip data to Facebook, MySpace, and others. Viewers are also able to comment on your photos. Another nice feature of the @trip desktop software, and the website, is the ability to “play back” your trip in an animated fashion. A graphic of a car will move along the plotted route, popping up thumbnails of your photos as the car passes over them.
If you take a lot of photos like I do when you travel, the i-gotU is a great device to have along to track your travels in detail. It’s small enough (approx. 1.75″ x 1.25″ x .5″) to not be noticed. I attached mine to my camera strap with the included silicon rubber case that had an opening in the back to put the camera strap through. The included software is easy to use, and the bundled @trip web hosting service is a nice plus. To sum up my pros and cons:
Pros:
-Small
-Battery life is great
-64,000 GPS waypoints can be tracked in the device’s memory
-Simple one-button operation
-Simple to use software
-@trip web hosting service
Cons
-Proprietary USB cable
-Indicator lights are hard to see in daylight
You may also like
Archives
- April 2025
- March 2025
- February 2025
- January 2025
- December 2024
- November 2024
- October 2024
- September 2024
- August 2024
- July 2024
- June 2024
- May 2024
- April 2024
- March 2024
- February 2024
- January 2024
- November 2023
- October 2023
- September 2023
- August 2023
- July 2023
- April 2023
- March 2023
- September 2022
- September 2013
- August 2013
- March 2013
- September 2012
- June 2012
- December 2011
- August 2011
- July 2011
- May 2011
- March 2011
- January 2011
- December 2010
- November 2010
- September 2010
- August 2010
- July 2010
- June 2010
- April 2010
- March 2010
- February 2010
- January 2010
- December 2009
- November 2009
- October 2009
- September 2009
- August 2009
- July 2009
- June 2009
- May 2009
- April 2009
- March 2009
- February 2009
- January 2009
- December 2008
- November 2008
- October 2008
- September 2008
- August 2008
- July 2008
- June 2008
- May 2008
- April 2008
- March 2008
- February 2008
- January 2008
- December 2007
- November 2007
- October 2007
- September 2007
Leave a Reply