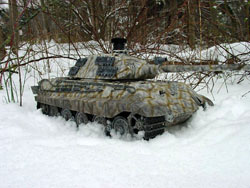
Tamiya King Tiger Porsche Turrent RC Conversion

Tamiya makes a full-option RC version of the famous King Tiger tank, but before they offered it, the only way to get a King Tiger full option kit was to make one yourself. Even today, if you want one with the Porsche turret (as opposed to the Henschel), you still need to make one yourself.
Fortunately, with some spare parts from Tamiya, a little ingenuity, and a static 1/16 scale Porsche-turret King Tiger tank from Tamiya, you can have your very own Porsche turret King Tiger full option RC tank.
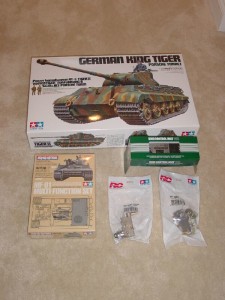
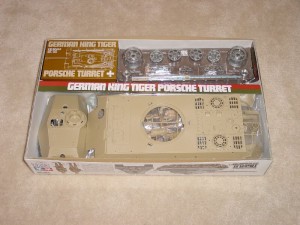
Here we have the various items needed to do our conversion: Static 1/16 King Tiger tank, Porsche Turret, Multi-Function units for drive mechanism and special effects, and two geared drive units (left and right). I have a full parts list below.
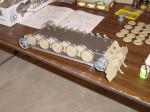
The chassis goes together first. The static version of the King Tiger has a fully working suspension, just like the RC versions, so no modifications are necessary here.
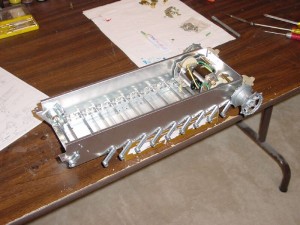
Even though this is a static kit, it uses the chassis from the RC version, so getting the drive components in is a snap. This is a shot of the chassis with the drive units installed. All of the mounting holes are already in the chassis (no drilling required!).
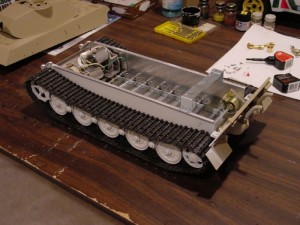
This is the assembled rolling chassis, already painted white (I am doing a winter camouflage theme). I used the stock tracks that came with the kit, but they are flimsy and prone to breaking under RC running. It’s best to upgrade to the heavier plastic tracks of the RC version of the King Tiger, or, get a set of after market metal tracks.

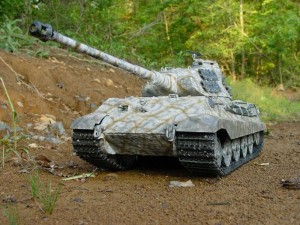
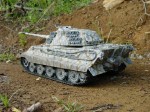
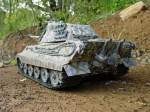
Hull has been painted and weathered. Turret was just set on top for a look. The white stuff on the side of the turret is an epoxy putty used to simulate zimmerit (an anti magnetic mine paste applied to the tank in a ridged pattern). Zimmerit effect is applied to basically all vertical surfaces of the tank. I used the tip of a screwdriver blade to make the ridges. The epoxy putty I used is called Zimm-it-rite and is made by a company called R&J Enterprises. It comes in two 45 gram containers. One order was enough to do the entire tank. Its really great to work with because it has a 2-3 hour working time and is water soluble during that time. I put it on, smooth it out to a very thin layer and let it set up for about 30 min before I start poking it with the screwdriver. At this point, the tank is driveable with the motors and radio installed.
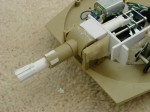
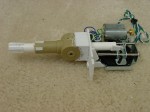
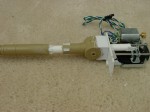
Now we get into the multifunction stuff. First on the list is the barrel recoil mechanism and mount. The left picture is the mantlet and the barrel. Since this is a static model, the mantlet had to be opened up a bit to allow the barrel to slide back and forth (for recoil effect). The picture on the right is the recoil drive mechanism with the mount for it fabricated out of styrene sheet. The small shelf below the hole in the mount is what I’ll mount the recoil unit to. The barrel will slide through the hole above it. Note: The gun flash strobe wires need to be lengthened due to the length of the King Tiger’s barrel.
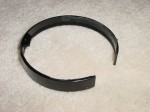
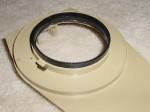
The opening in the bottom of the King Tiger’s turret is smaller than that of the Tiger 1, so the turret ring is cut and reinforcing material removed so that it can be fit in the King Tiger’s turret opening. Since the ring is glued against the wall of the opening, the reinforcing material isn’t needed. And, it is is easier to conform to the opening without the reinforcing. The ring is mounted so that the toothed portion extends below the opening as pictured above. This is necessary to mate with the output gear of the turret rotation drive. The ring is mounted so that the cut is at the FRONT of the turret opening. This is because the turret rotation drive unit will be mounted to the back of the turret opening in the hull. With the ring cut being at the front of the turret, opposite the drive mechanism, the turret will be able to rotate nearly 360 degrees.
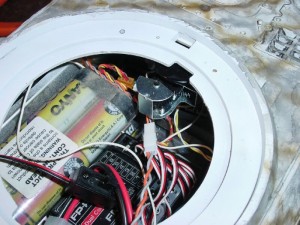
The turret rotation drive is very easy to install. With the turret installed, line up the drive unit with the turret from under side the hull of the tank. I used styrene shims to position it in the proper location. This picture shows it mounted to the exact rear of the turret opening in the hull.
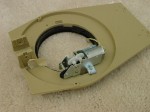
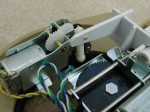
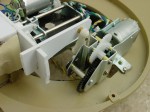
Gun elevation is accomplished here. Temporarily mount the barrel assembly, recoil unit and all, to ensure the gun elevation drive has sufficient clearance. I cut and used the stock Tiger 1 elevation drive mount. It was cut because normally it spans the entire turret opening, but with the smaller opening of the King Tiger, it would obstruct the recoil mechanism. I fabricated an elevation “lever” out of styrene which is mounted at a right angle to the back of my recoil mount. Using ball links, the lever as connected to the output shaft of the elevation drive.
Once this is done, finished assembly proceeds normally, with detail parts added and final paint and weathering.
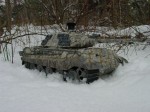
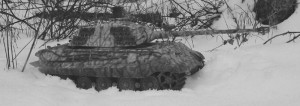
Here’s a short clip of my converted King Tiger in the snow!
Parts needed for the conversion:
|
DESCRIPTION |
PART |
TIGER |
KING |
| Tamiya motor/gear box (Left) |
4205017 |
Yes |
|
| Tamiya motor/gear box (Right) |
4205018 |
Yes |
|
| MF-01 Full Hop-Up Package |
53446 | ||
| T-03 DMD Unit |
7255012 |
Yes |
|
| Machine Gun Bag |
9415666 |
Yes |
|
| J Parts Bag. Parts used: Turret Ring, (3) Rollers, J2, J3 & J4 |
9115110 |
Yes |
|
| Mechanism Deck |
4305434 |
Yes |
|
| Stay Parts Bag: Parts used: Spring, Turret Stay, Recoil Stay, Gun Elev. Stay, Antenna |
9415670 |
Yes |
|
| Screw Bag “D”. Parts used: Screws, Washers, Ball Connector |
9465564 |
Yes |
|
| Double Sided Tape Bag. Parts used: (2) White Adjusters from this bag. These may be available at hobby shop. |
9415678 |
Yes |
|
| Screw Bag “E”. Parts used: threaded rod for White Adjusters. These may be available at hobby shop |
9465565 |
Yes |
|
| Screw Bag “B”. Parts used: only E-ring part MB6. This may be available at hobby shop or hardware store |
9465562 |
Yes |
|
| Screw Bag from King Tiger |
9465553 |
Yes |
NOTE
1: The MF-01 Full Hop-Up Package (#53446), T-03 DMD (#7255012),
and Motor/Gear Boxes can be obtained from Tamiya America.
NOTE
2: The MF-01 Full Hop-Up Package (#53446) includes some hardware
needed, but not all. The remainder can be purchased at your local
hobby shop or hardware store or you can order Screw Bag A (#9415561) and
Bag C (#9465563). Keep in mind that you will only use some of the
parts in Bags A and C.
The
hardware you will need includes:
|
DESCRIPTION |
QTY |
USED |
SCREW |
| 3x6mm metal screws |
4 | Mechanism Deck |
Bag A |
| 3x8mm self tapping screws |
3 | Mount Turret Rotation Unit |
Bag A |
| 3x6mm metal screws |
2 | Mount Turret Stay to Turret Ring |
Bag A |
| 2x4mm metal screws |
2 | Gun Elevation Unit to Turret Stay |
Bag C |
| 3x8mm self tapping screws |
4 | Mount Recoil Stay to inside of Mantlet |
Bag A |
| 2x4mm metal screws |
3 | Attach Barrel Recoil Unit to Mantlet |
Bag C |
| 2x6mm metal screws with counter sink heads |
2 | Attach Turret Ring to Turret |
Bag A |
| 3x8mm self tapping screws |
2 | Gun Elevation Stay to Mantlet |
Bag A |
[wordbay]Tamiya King Tiger Full Option[/wordbay]
Originally posted 2014-06-18 19:51:34.
You may also like
10 comments
Leave a Reply
Archives
- April 2025
- March 2025
- February 2025
- January 2025
- December 2024
- November 2024
- October 2024
- September 2024
- August 2024
- July 2024
- June 2024
- May 2024
- April 2024
- March 2024
- February 2024
- January 2024
- November 2023
- October 2023
- September 2023
- August 2023
- July 2023
- April 2023
- March 2023
- September 2022
- September 2013
- August 2013
- March 2013
- September 2012
- June 2012
- December 2011
- August 2011
- July 2011
- May 2011
- March 2011
- January 2011
- December 2010
- November 2010
- September 2010
- August 2010
- July 2010
- June 2010
- April 2010
- March 2010
- February 2010
- January 2010
- December 2009
- November 2009
- October 2009
- September 2009
- August 2009
- July 2009
- June 2009
- May 2009
- April 2009
- March 2009
- February 2009
- January 2009
- December 2008
- November 2008
- October 2008
- September 2008
- August 2008
- July 2008
- June 2008
- May 2008
- April 2008
- March 2008
- February 2008
- January 2008
- December 2007
- November 2007
- October 2007
- September 2007
Looking at your Porche turret KT is awesome. Consider selling that? Would love to add that to my collection of KT’s. Let me know, thanks.
I have Tamiya Kit #56007 Porsche Turret (Lower hull drive only) and would like to convert it to full option. Is this possible? If so, Can you provide me with a list of the necessary parts?
Thank you,
Cliff Starkey
I did this conversion over 10 yrs ago. The parts list is provided in this article, but the list is old. I’m afraid you’ll have to do your own research at this point. Sorry I couldn’t be of more help. Good luck!
Thank you very much for your prompt reply.
I understand that you did your conversion quite sometime ago and i appreciate you getting back to me at all on this.
The good news is, i believe most, if not all of the F/O parts to upgrade my old Tam # 56007 KT are still available.
Also, i am very impressed with your work and really appreciate you sharing the conversion in such detail. Your F/O KT Porsche is a work of art. Excellent job! I am going to give it a go and i do not think I could do it without your tutorial.
Thanks again,
Cliff
If the parts are still available, you should have no problem adding the multi-function items.
That good news.
Thanks again,
Cliff
PS- I will keep you post on my conversion if you like. Probably will not get started until after Christmas but I will send you a note from time to time if you like.
Also, would you mind if I contact you if i run into any problems?
Yep keep me posted!
Thank you my friend
Hi there
Awesome work on your converstion matey,its realy inspired me to start my static to full option converstion which is the old clutch type full option king tiger.
Hey Mike, thanks a lot. Good luck on your conversion. Most of it is simple. The hardest part was the gun elevation and recoil.