
Overland Models UP Steam Turbine Number 1 & 2


OK, next to the Overland Models UP Coal Turbine #80, the UP Turbine #1 and #2 were my second of two “holy grails” of model train collecting.

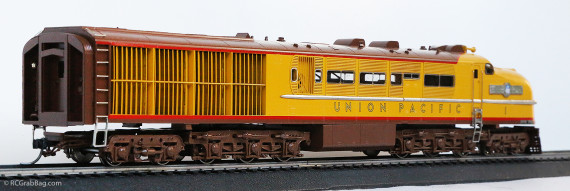
The Union Pacific railroad was never afraid to try anything new. Wanting to try an alternative to conventional steam power, UP worked with General Electric and began building two experimental oil-fired steam turbine locomotives in 1936. Simply named #1 and #2, UP took delivery of the locomotives in April, 1939. Oil was fired to heat the water from a 50 gallon tank into steam. The steam turned a turbine which turned a generator to power electric traction motors. The steam was then collected and condensed back into water through condenser units in the rear. Slats in the rear side panels opened and closed automatically depending on outside air temperature and density to regulate the airflow through the condensers. These steam turbines were the first of their kind in North America. They each produced 2400hp and were often run together as a pair. Because of the need for unrestricted, smooth airflow into the condenser units, the locomotives had to be run nose-to-tail, instead of the more common tail-to-tail.
Sadly, the locomotives proved unreliable in service and were returned to GE in June, 1939 after only two months in operation. #1 and #2 were the only steam powered locomotive GE ever built.
Word War II put tremendous strain on the railroad system in the US, and UP Turbine #1 and #2 were briefly brought out of retirement. They were painted dark gray and renamed to GE 1 and 2. During 1943, they were leased to the Great Northern Railway for nearly a year for wartime short-haul freight service in Washington, performing without major failure. By late 1943, they were returned to GE and retired and later scrapped.

If one wants to run the Overland Models #1 paired with a #2 as the prototypes did, one has to first find a #1, which is really hard. Even harder is finding a #2. Less of the #2’s were made (53 vs 72) and their current owners are not looking to part with them anytime soon. I know because I’ve been looking for one for what seems like forever. I finally found one online after many many searches. BrassTrains.com had just listed one when I happened to check the site quite by chance. It’s pictured above and is in excellent shape.
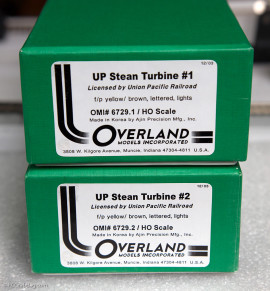
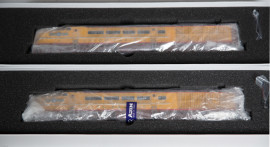
Funny thing about the number #2, BrassTrains also had a #1 listed. I already had the #1, but in my haste to secure the #2, I accidentally bought the #1. I recognized my error quickly, but the purchase had already been committed. So, I went right back in and bought the #2. I now have two #1’s so one will be sold, probably through ebay.


The two look awesome together. As mentioned previously, the prototypes ran like you see them here – nose to tail, or “elephant style” as it’s often referred.
So, it’s time to get these things all DCC’d up!
Installing DCC is fairly easy. Lighting was a bit more of a challenge. The models come equipped with factory lighting, but it consists of small incandescent bulbs which are not very bright and tend to burn out. I prefer to replace this type of lighting with LEDs of a ‘golden white’ color (a color which resembles the color of incandescent bulbs, but brighter). I’ve covered installing DCC and LED lighting in greater detail in two other posts – OMI ‘Big Blow’ turbine and OMI Coal Turbine #80 – but I would like to talk about one of the unique challenges with this model.
The UP #1 and #2 have lighted ‘winged’ UP badges on either side and just forward of the cab. They are translucent in the lighter areas of the badge itself so light can shine through. From the factory, they are lit from behind by three incandescent bulbs and as I stated before, they are very dim. They also do not light the badge evenly. The solution to this problem came from a crafty internet search (I’m really good at crafting search phrases to find what I want) that led me to a product called ‘side glow’ optical fiber.
I’ve used optical fiber a lot for various lighting effects in my DCC conversions, so I’m familiar with its properties. Side glow optical fiber differs from regular optical fiber in that it not only glows on the ends, it also glows along its length. It’s not perfect – the glow fades as the distance from the light source increases, but for the short length that I would need behind each badge, it worked perfectly.
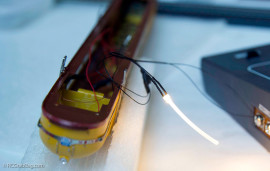
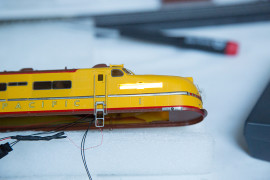
Here is a short length of side glow fiber under illumination from an LED that I glued onto the end. Note the glow along the entire length. The second photo shows emblem removed and the fiber sitting in a alcove previously occupied by the incandescent bulbs.
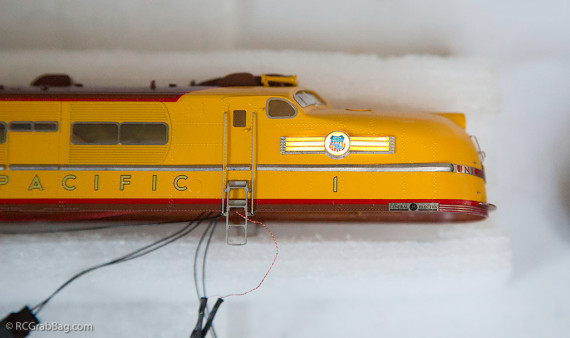
And here the emblem has been reinstalled and the lighting turned on. Notice the nice even illumination.
And here’s #1 and #2 with all lighting installed. The top light is a surface-mount LED (smd), the headlight a small LED bulb, and the two marker lights are (regular) optical fiber strands illuminated from the other end by LEDs. And of course, the ‘side glow’ illuminated badges.
Overall I love the effect.

And of course, the pair in all of their DCC glory.

The Overland Models #1 & #2 are very hard to find and pretty pricey. Alco Models made a really nice version of the #1, probably back in the 1970’s, but it’s actually a very nice model. It’s pictured here behind the OMI version. It’s a bit different in terms of detail and paint, but the detail is very nice to be sure and it runs super-smooth. I was quite surprised when I put it on the track and it just glided silently down the track. This is an old model, so to see it run so smoothly right out of the box is a testament to the quality.

The paint tones are slightly different between the OMI and Alco models, with the OMI brown having a more reddish hue to it, and the yellow being more saturated. But the detail on the Alco is really nice. Just like the OMI model, the condenser vanes are moveable and are linked together so they all move at once. The panels around the side windows are silver and I’m not sure which is really correct, or if they’re both correct and reflect different time periods. I was originally planning to make this a #2, but with the acquisition of the OMI #2, this Alco model will also be sold.
And finally, some video of this unique pair on the club layout:
[wordbay] overland models ho[/wordbay]
Originally posted 2015-10-12 20:19:47.
You may also like
5 comments
Leave a Reply
Archives
- April 2025
- March 2025
- February 2025
- January 2025
- December 2024
- November 2024
- October 2024
- September 2024
- August 2024
- July 2024
- June 2024
- May 2024
- April 2024
- March 2024
- February 2024
- January 2024
- November 2023
- October 2023
- September 2023
- August 2023
- July 2023
- April 2023
- March 2023
- September 2022
- September 2013
- August 2013
- March 2013
- September 2012
- June 2012
- December 2011
- August 2011
- July 2011
- May 2011
- March 2011
- January 2011
- December 2010
- November 2010
- September 2010
- August 2010
- July 2010
- June 2010
- April 2010
- March 2010
- February 2010
- January 2010
- December 2009
- November 2009
- October 2009
- September 2009
- August 2009
- July 2009
- June 2009
- May 2009
- April 2009
- March 2009
- February 2009
- January 2009
- December 2008
- November 2008
- October 2008
- September 2008
- August 2008
- July 2008
- June 2008
- May 2008
- April 2008
- March 2008
- February 2008
- January 2008
- December 2007
- November 2007
- October 2007
- September 2007

/where did you get this mate? I’m trying to find to find them as well.
This one came up on ebay. They are very hard to find.
VERY NICE VIDEO’s YOU >POSTED>>LIKE TO SEE >ALCO C855’s Running & MAYBE >WITH SOUND OR NOT
BE NICE TO SEE RUN THEM IF YOU CAN >HAVE ANY TO SELL HO & >O>I MISSED YOUR OMI #80 COAL TURBINE IF SELLING >ANYMORE >>ABOVE >>PLEASE CONTACT ME
fkalco1@aol.com OR AT 518 3562039 E.S. TIME AFTER >9am OR ANYONE SELLING ABOVE
>>>WAY TO GO CAMERA IN LOCO’s & YOU TUBE VIDEO’s TO ENJOY THIS HOBBY
THANKS AGAIN
>IF YOU DONE ABOVE YOU TUBE PLEASE LET US ALL >HOW TO LOCATE THEM<
Frank Konopka
Great site. I have been looking for these turbine locos forever. If you wanted to sell them ever, I would be happy to buy them! Thanks
-Bill
I have watched most of your youtube vids, excellent vid & audio! Just ran into your article on your website, nice upgrade on the UP #1  Turbines, please advise when you’ll be posting the #1 on ebay.
I attended the NMRA 2015 convention in Cleveland, two gents from CA had a booth and showed their intention (now where did I leave their brochure?) of modeling the UP M-10003. Haven’t heard anything so far, guess I better check out your website for the Overland set.
What part of the country is your club layout located and what was the building’s original use?
Thanks much,
Doc
(no need to post this?)